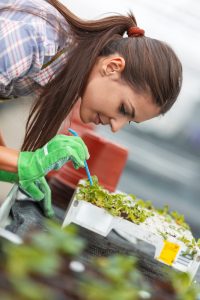
It may be a quiet time in the garden, but it’s also a good time to get ahead and look at indoor seed sowing in January. While it’s quieter outside in the garden, it’s good to take the opportunity to sow seeds for the coming year.
January in the UK marks the heart of winter, with short days and cold temperatures common across the region. Although, the temperatures vary considerably from from the south to the north of the UK. However, this doesn’t mean gardening activities need to come to a halt. Indoor seed sowing in January is not only possible, but it can also be incredibly rewarding. By starting early, gardeners can get a head start on the growing season, giving plants a better chance to flourish.
When sowing seeds indoors, you are not at the mercy of unpredictable weather; I have control over the growing environment. This period can also provide an advantage for certain long-season crops that need more time to develop. I’m also able to experiment with a wider range of plant varieties—some of which may not typically thrive in the UK climate if planted outdoors too late.
Enjoy Your Garden
Remember that growing and working in your garden should be fun; it’s always good to experiment with different seeds and plants. Over a period of time, huge amounts of knowledge and experience can come just from experimenting with various ways of planting etc.
Choosing the correct seeds is crucial for a successful January start. Hardy vegetables such as leeks, onions, and some brassicas are more tolerant of the cooler conditions later when transplanted outside. On the flip side, starting flowers like petunias or begonias indoors can offer a head start to a vibrant garden. In addition to selecting appropriate seed varieties, understanding their individual needs is key to ensuring they prosper during these early stages.
By reaping the early rewards of January indoor seed sowing, I’m also setting the foundation for the rest of the year. Getting in tune with the timing for each plant ensures that by spring and summer, both flowers and vegetables are well-established, robust, and ready for transplanting. Utilizing this head start correctly can lead to an extended blooming period for flowers and an earlier harvest for many vegetables.
Setting the Stage: Preparing Your Indoor Sowing Environment
Your indoor sowing success hinges on constructing a suitable environment. You’re effectively becoming Mother Nature, providing all the right conditions for your seeds to burst into life. Let’s explore the core components you’ll need to create such an environment right inside your home.
First, consider your staging area. A space with a stable temperature and protection from pets and drafts is ideal. A spare room, a quiet corner, or even some space on a warm windowsill could serve perfectly. Just make sure there’s enough room for your plants to grow without being cramped. If you have a conservatory, that can be an ideal place to start plants off in January. Or if you have the luxury of a heated greenhouse, which is ideal for early sowing. Another option is heated propagators, which can create perfect conditions for seedlings. Cold frames and veg trugs are also great options.
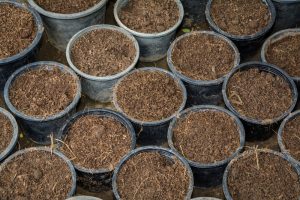
Use The Right Compost
Choosing the right soil is key to getting your seeds off to a flying start. Opt for a seed-starting mix or peat-free compost, which is light and sterile, to avoid common diseases that can plague your seedlings. The right soil will give your seeds the best chance of sprouting successfully. Make sure your seed trays are cleaned and washed from last year’s season to avoid any disease risks, etc.
Now, let’s talk about containers. They can be as simple as repurposed yoghurt pots with drainage holes punched into the bottom; you’re looking for functionality, not high design. However, if you’re serious about your hobby, investing in a set of seed trays or a propagator can offer added control over the growing environment.
Good lighting is crucial. Short winter days don’t provide enough light for optimum growth, so complement natural sunlight with artificial grow lights. Adjusting these lights to remain a couple of inches above the growing plants will ensure your seedlings don’t become leggy and weak.
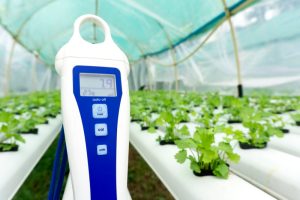
Temperature Control
Temperature control cannot be overlooked. Many seeds need a warm environment to germinate, typically between 18-21 degrees Celsius. A heated propagator or a simple heat mat can keep your seedlings cosy. Avoid placing containers near radiators, though, as this can dry out the soil too quickly.
Keep in mind moisture is your friend, but only in the right amount. Mould and fungal diseases often stem from overwatering or poor ventilation. Covering seed trays with a clear lid can help retain moisture and warmth, but remember to lift the lid daily to let the air circulate.
By taking the above action, you’re on track for strong, healthy seedlings. Moreover, you can avoid many common problems associated with starting seeds indoors, such as poor germination, damping off, leggy growth, and more. This supportive environment creates the perfect bridge to your next step: the actual planting and nurturing of your seeds.
Sow, Nurture, Thrive: Step-By-Step Guide To Indoor Sowing
Sowing your seeds may seem simple but getting it right is crucial for your garden’s success. I start by selecting appropriate trays or pots. Each seed has its own space requirement, so I refer to the packet instructions. I’m careful to use a soil mix that’s designed for seed starting, ensuring the delicate sprouts can push through easily.
Next, it’s about depth. Planting seeds too deep is a common mistake. A good rule of thumb is to plant seeds no deeper than twice their width. I gently press the seeds into the soil and cover them lightly. With that done, labelling is key. Remember, in a few weeks, it’s hard to tell parsley from coriander!
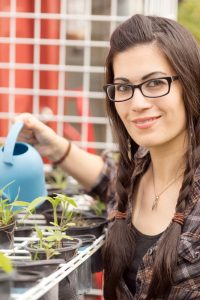
Don’t Over Water
Watering is the delicate balance in seed starting. Too little, and the seeds won’t germinate. Too much, and you risk ‘damping off’, a fungal problem that’s every gardener’s nightmare. Remember that water is the gardener’s best friend! I use a fine mist to keep the soil moist without overwhelming the seeds. A clear plastic cover or mini greenhouse can help maintain this moisture while the seeds germinate.
I keep a close eye on the seedlings once they emerge. Overcrowding can weaken plants, so I’m prepared that I might need to thin them out. This might feel counterintuitive, but your plants need room to grow strong roots. As the seedlings grow, I ensure they get enough light, rotating the containers for even growth and monitoring the temperature to maintain a steady warmth.
Seeds sown in January might offer a head start, but they require careful handling. Transplant-ready plants should be sturdy and healthy. That’s the cue to prepare for the next step: acclimating them to the great outdoors. This is a gradual process, one that helps the burgeoning greenery adjust without shock. After all, no matter the care indoors, nature’s environment is where they’ll flourish.
Beyond January: Ensuring Continued Success For Your Seedlings
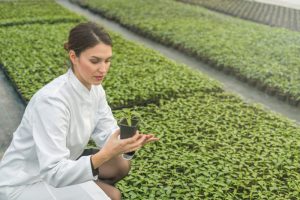
I understand the joy and anticipation that comes from nurturing seedlings. You’ve put in the effort during January, and as the days stretch longer, it’s time to think about the next steps for your young plants.
Hardening off is critical. This process involves gradually exposing your indoor-raised seedlings to the outside world. Over a week or two, start by placing them outdoors in a shaded, sheltered spot for just a few hours, and slowly increase their exposure to sun and wind. It’s a way to bolster their resilience before the final transplant.
But when exactly should you plant them out? The answer depends on the last frost dates and the specific needs of each plant species. A general rule I follow is to wait until there are consistent, frost-free forecasts and soil temperatures have warmed sufficiently. This will vary depending on where you live.
Once your plants make the move outdoors, your nurturing doesn’t stop. Regular feeding with suitable fertilizers, consistent watering, and vigilance against pests and diseases are essential. Notice how your plants respond to different conditions. It’s equally important to provide support structures for those that need it.
To Conclude
I always recommend keeping a gardener’s journal. Jot down when you sowed, what you noticed during growth, and any issues you encountered. This record can be invaluable for refining your methods each year. Ultimately, these steps aren’t just about care; they’re about creating a strong foundation for growth, and that’s what turns a gardener’s early efforts into a season of bountiful blooms and harvests. Remember that we never stop learning, so taking note of your efforts can increase your results for the future.